Roles and Permissions
Moyasar lets you invite team members to your account and control what each one can do through roles. A role is a set of permissions; assigning a role to a member grants them exactly the access that role allows.
Getting Started
- Go to https://dashboard.moyasar.com/
- Log in to your account.
- Open the Team and Roles tab from the sidebar, under Configuration.
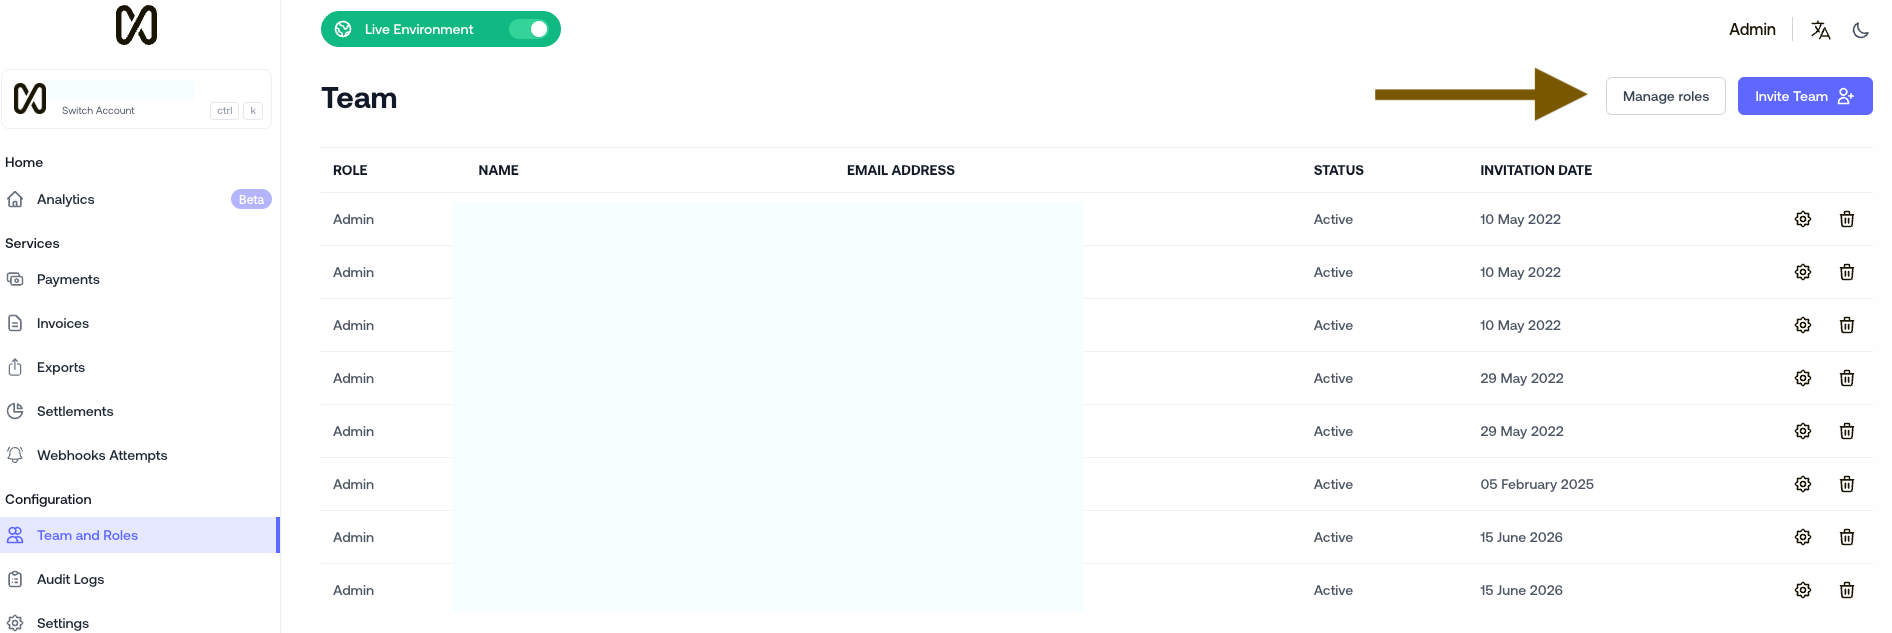
The Team page lists every member with their Role, Name, Email Address, Status, and Invitation Date. From the top of this page you can open Manage roles or Invite Team, and each row has actions to edit or remove the member.
Manage Roles
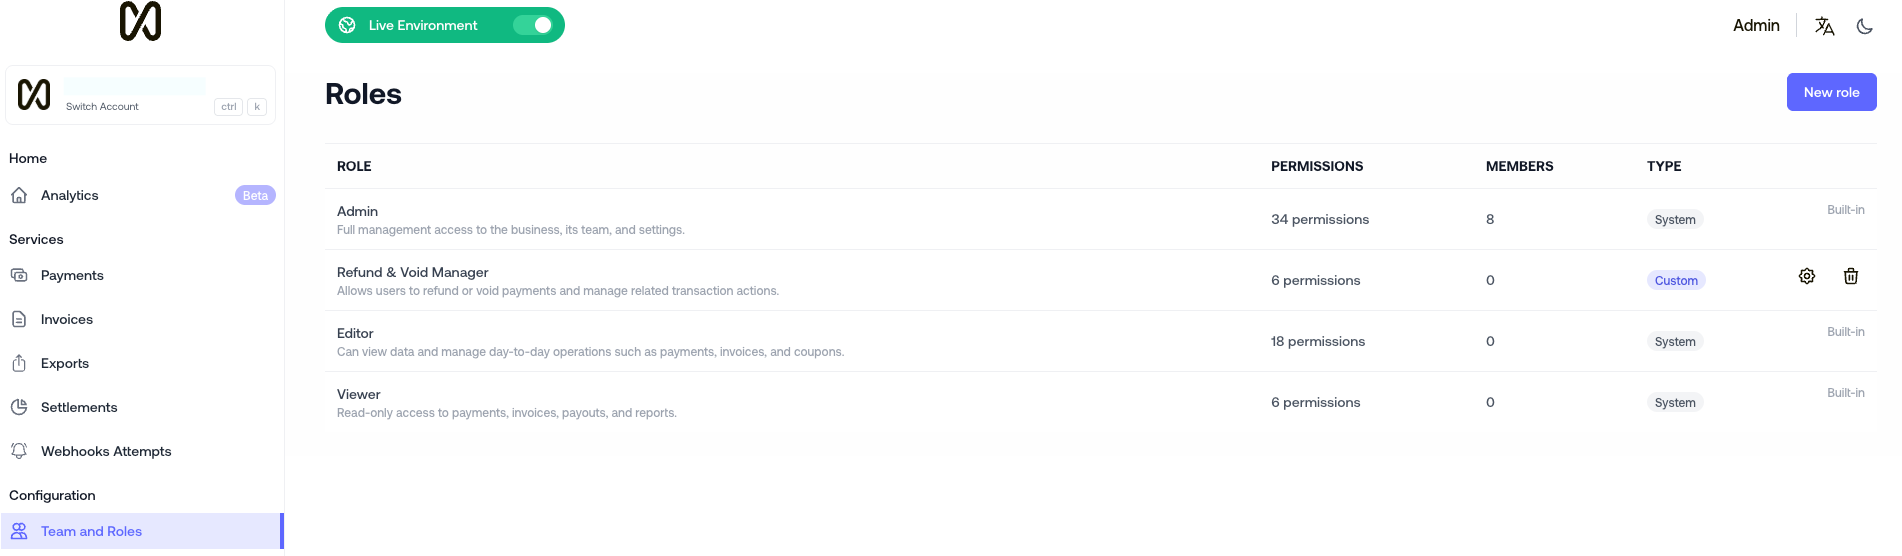
Click Manage roles at the top of the Team page to open the Roles screen. Each role shows its permission count, how many members are assigned to it, and its Type:
- System roles are built-in and cannot be edited or deleted.
- Custom roles are ones you create, and can be edited or deleted from the actions next to them.
Click New role to create your own.
Create a Role
On the New role screen, give the role a Name and a short Description, then select the Permissions it should grant. Permissions are grouped by area (Payments, Invoices, and so on), and you enable them individually.
For example, a "Refund & Void Manager" role might enable View payments, Refund payments, and Void & cancel payments while leaving other permissions off.
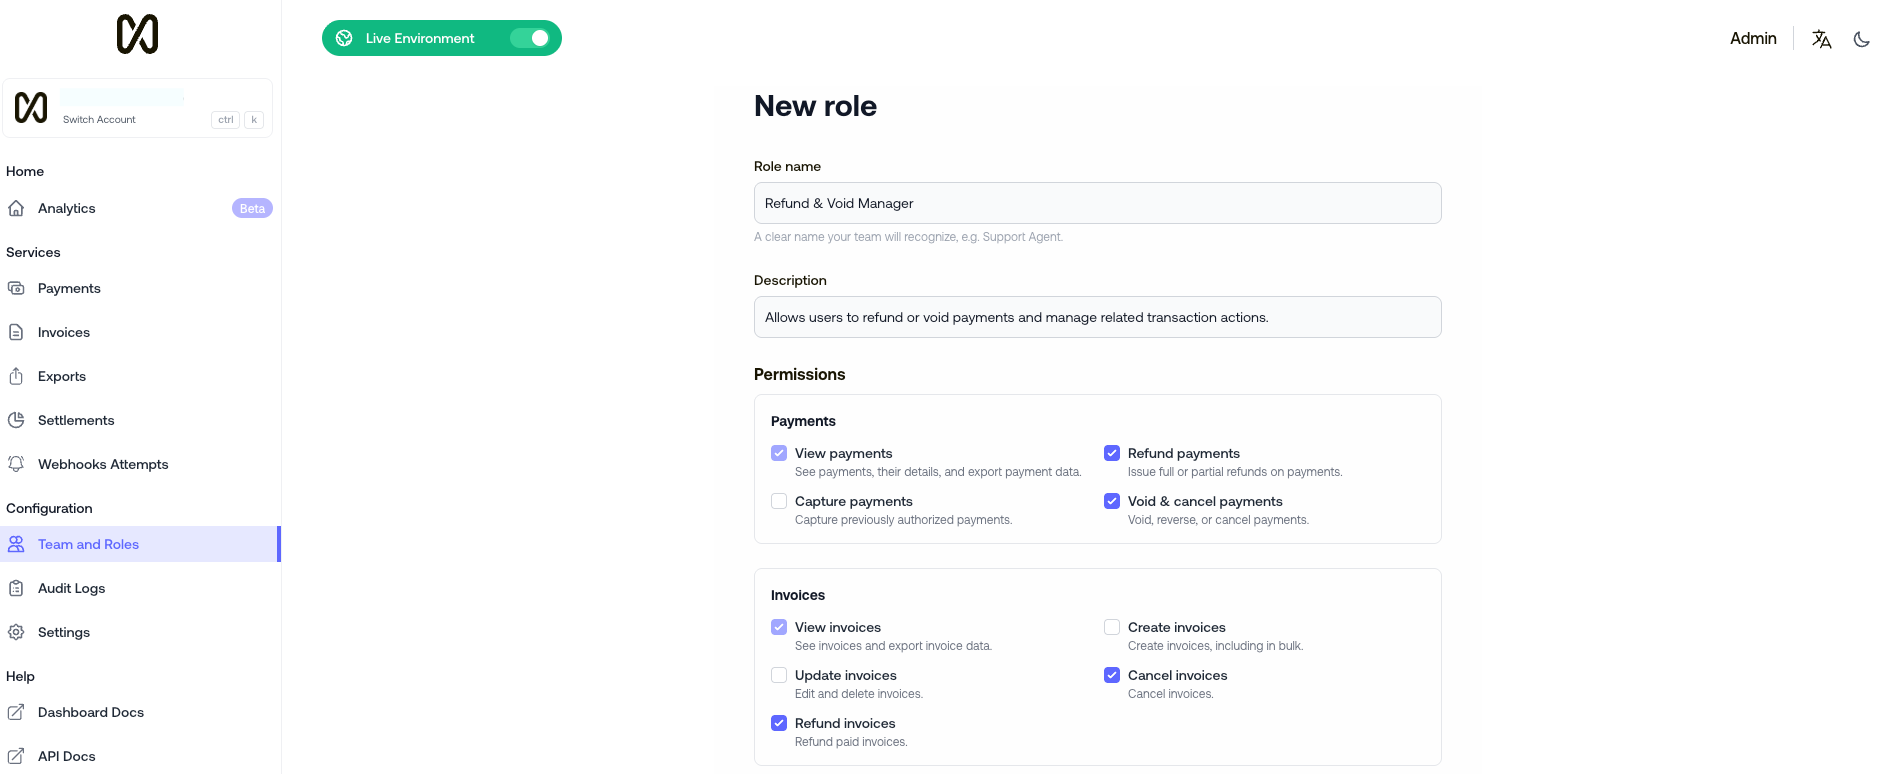
Save the role to make it available when inviting or editing members.
Invite a Member
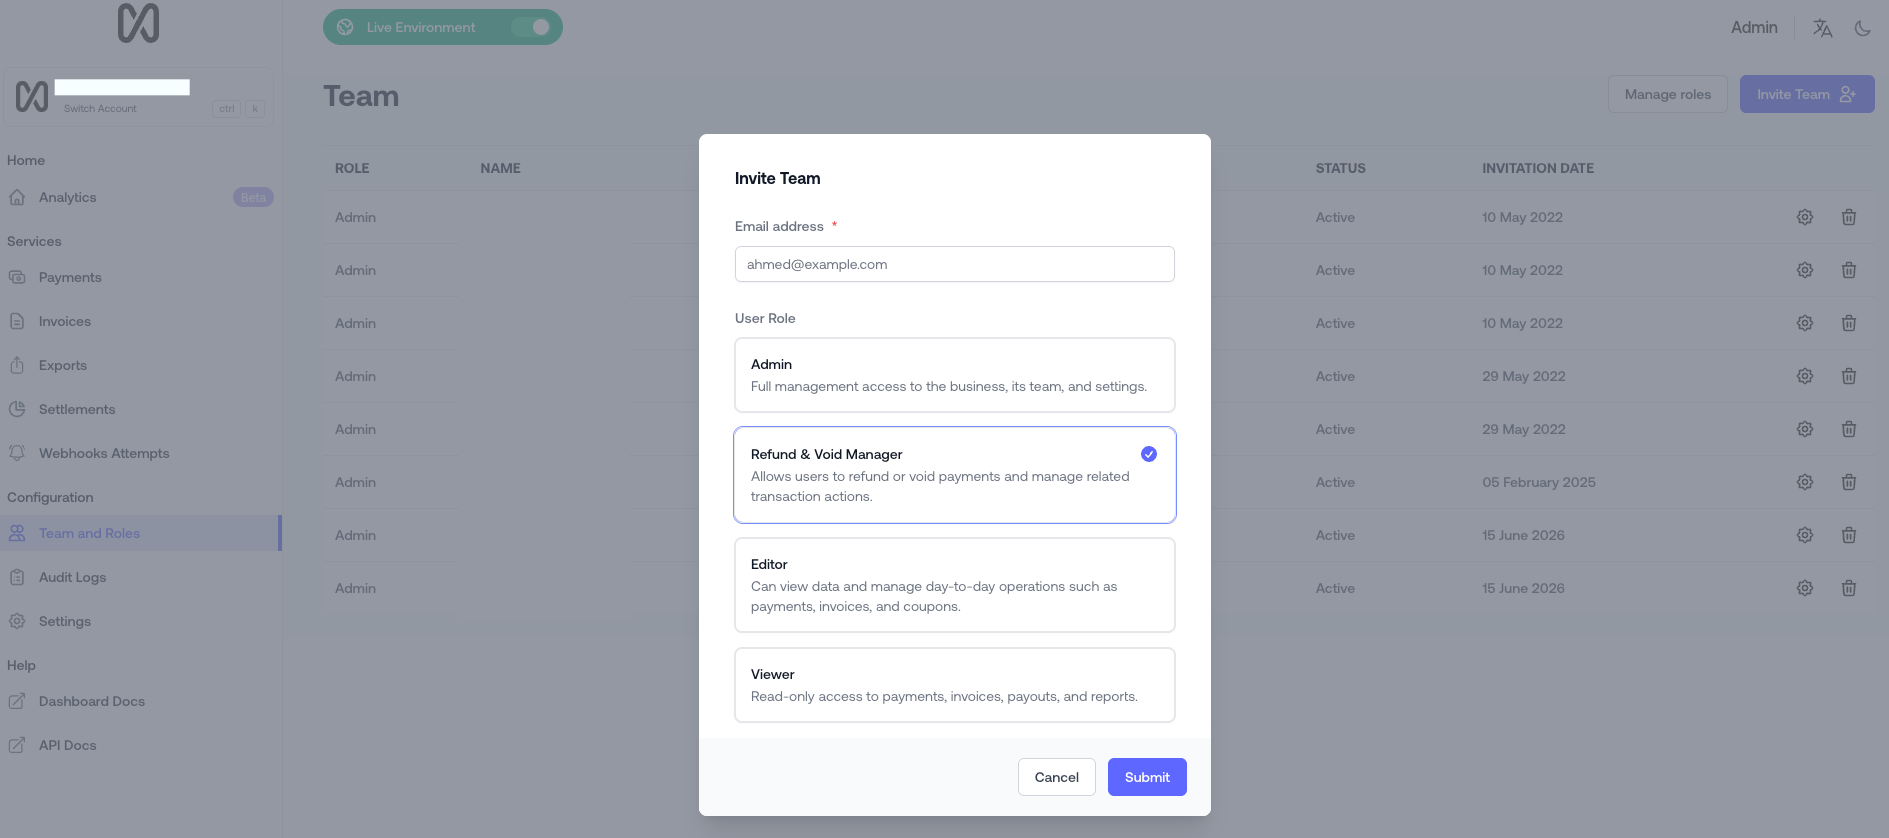
Click Invite Team at the top of the Team page. In the dialog:
- Enter the member's Email address.
- Choose the User Role to assign — both System and Custom roles appear here.
- Click Submit.
Moyasar sends an invitation email to that address, and the member appears in the list with a Pending status until they accept.
Accept and Process an Invite
The invited person receives an email from Moyasar with a link to join your account.
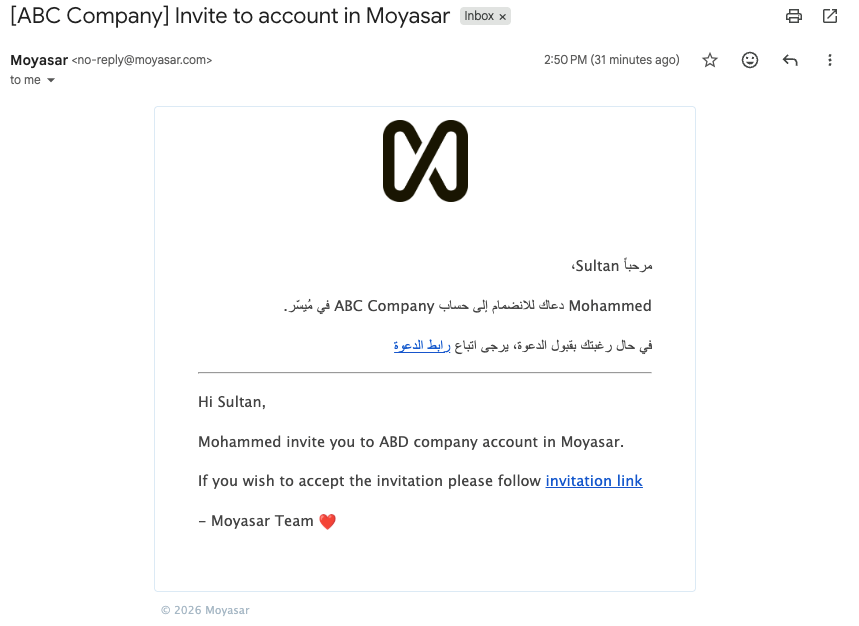
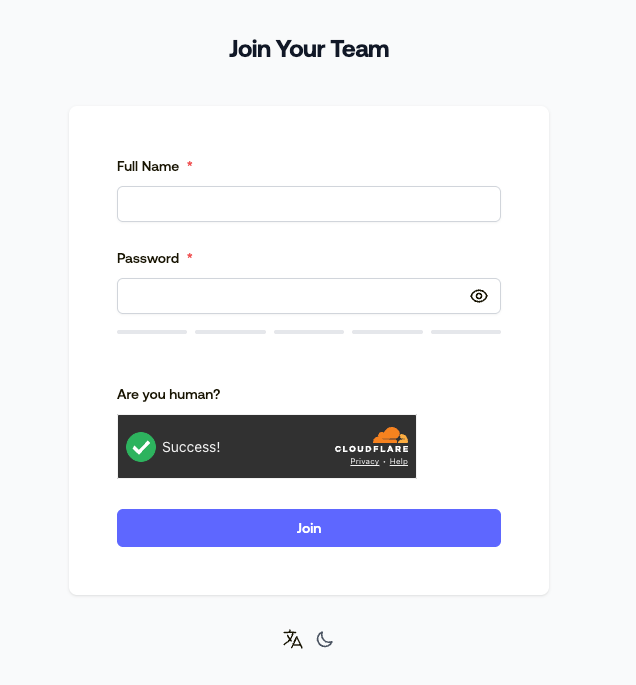
They click the invitation link to accept. If they don't already have a Moyasar account, they complete a short registration form with their Full Name and Password. Submitting the form completes and accepts the invite, and the member becomes Active on your Team page.
Permissions in Effect
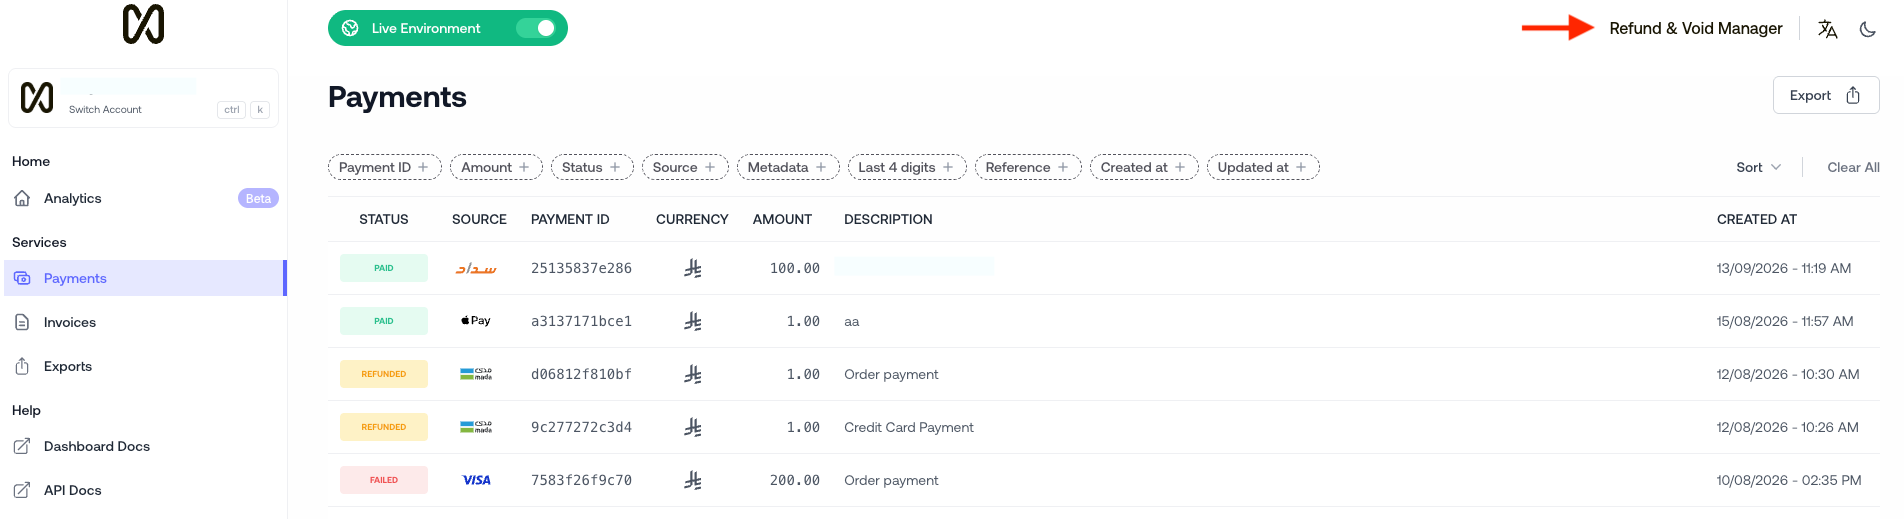
Once a member joins, the dashboard only shows the sections and actions allowed by their role. A member with a limited role sees a reduced sidebar and fewer options — for example, someone assigned the "Refund & Void Manager" role sees only the payment-related areas their permissions cover, with their role name shown in the top corner.
Set a Role for a Member
You can change a member's role at any time from the Team page. Use the actions next to the member to edit them, then select a different Role and save. The new permissions take effect immediately.